A place for me to show off all my wargames stuff.

Latest

Britons Versus Romans – After Action Report

This game should really be titled – “When the Roman commander can’t roll higher than a 3 on a D6 all night”…

Its been a while since we have played  Hail Caesar by Warlord games so we were all a bit rusty on the rules and a few mistakes were made, more on those later. Nevertheless great fun was had as usual when using these rules.

The two armies are my Ancient Britons and Chris’ Romans. Both of these are fledgling armies as we try to work out what we both need to have a good game and get them painted. That said, my Ancient Britons are almost complete. On the other hand the Romans are really only the core units of an army.

This is the second time they have faced each other. Last time it was on a smaller table (6ft x 4ft) with no room to maneuver. That battle was a real meat grinder with the Briton skirmishers getting driven off and then the Warbands being ground down by the Romans. It was pretty bloody on both sides but ultimately a decisive Roman victory with most of the Britons being back in the ‘box’ before the battle ended. In that battle we even forgot to use the pilum special rule for the Romans. My over riding memory of that battle is the Romans saving almost every hit they suffered.

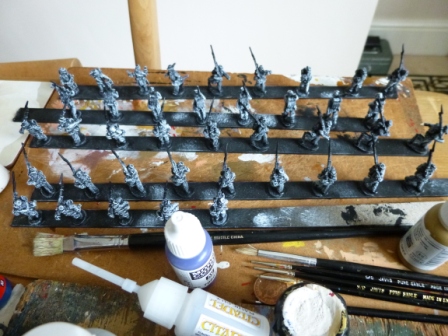
This time the Britons have expanded by three small units of light horse…the Romans were the same as last time. Their reinforcements have apparently not been issued with equipment yet i.e. they are not painted! We also used the new 8ft x 5ft table top that I have recently made, although the blanket did not cover it all (about 7ft x 5ft). Incidentally the blanket is a family heirloom of sorts. It is the last blanket my Grandad was issued during WW2…

We wanted a fairly simple game, so an open table was the order of the day.

Setting up:

The Britons were on the table pretty sharpish. There was no time to waste!. On the right wing Magicstix the Druid had 3 warbands, 2 small light horse, and a bunch of skirmishers with slings.

In the middle ‘the chieftan’ had 2 warbands, a unit of light chariots, 2 skirmishes with slings and a skirmishing unit of dogs (we give these stats equivalent to javelin armed skirmishers).

On the left wing a third command with 1 warband, 1 light chariot, 1 medium cavalry and a small unit of light horse. They were fidgeting about so the camera is a bit out of focus…

BritonsVsRomans (1)cBritonsVsRomans (2)cBritonsVsRomans (3)c

Opposite the Romans considered their deployment and adjusted themselves to make sure they were perfectly regular. It almost brought a tear to the eye to see them so neatly arranged as they faffed about adjusting half an inch here and there… 😛

BritonsVsRomans (4)c

The Plan…For the Britons the plan was to engage the Romans with skirmishers while the left wing advanced around their flank, and then charge in with a decisive blow.

For the Romans it was fairly clear they were going to form a continuous line between the woods and then steamroller everything in front of them at once. Just like last time…

First Turn

The Romans got first turn and shuffled forwards a little. Would you believe they fluffed all the command rolls and only moved at all because most of them have the ‘drilled’ special rule. We didn’t realise this was going to be pretty much how the whole night was going to go.

For the Britons. The left flank light horse decided that they really should be a lot further over to their left, rather than going forwards (blunder command roll!).

In the centre the skirmish screen ran forwards to engage the Roman line, the warbands staying behind to give the skirmishers room to maneuver. On the right Magicstix moved his command forward as one.

BritonsVsRomans (7)cBritonsVsRomans (5)cBritonsVsRomans (6)c

Second Turn

The Romans continued to shuffle forward in a continuous line, each legionnaire being careful to stay in line and not become exposed.

The light cavalry on the Briton left wing were now satisfied with their deployment and advanced. The rest of the left wing were a bit grumpy with their general attitude and decided to stay where they were (failed command). In the centre and on the right the skirmishers closed in to start pelting the Romans. They were unusually effective and Roman units began to suffer stamina reductions, clearly something was wrong with the Roman armour.

BritonsVsRomans (9)cBritonsVsRomans (10)cBritonsVsRomans (8)c

Third Turn

The Romans chased off the skirmishers in the centre by threatening to charge them. We (I) made a mistake at this point and we made the evade rolls before the checking to see if the Romans would make contact during their charge. The Romans continued to shuffle forwards, but the skirmishers ran for their lives…a good long distance! If we had done it properly the skirmishers would have stayed put as none of the Romans made a sufficiently decent charge move to make contact. They clearly were not in a mood to listen to orders… On the Roman left, we did the charge moves properly. The Roman infantry surged forwards to chase off the Briton light horse that was throwing pointy sticks at them, and the light horse ran off all the way back to their starting positions (annoying when they do a three move evade…).

BritonsVsRomans (12)c

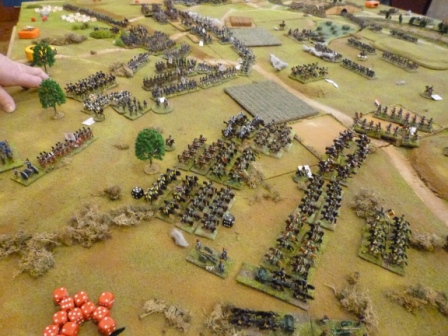
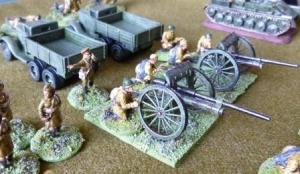
At last the Briton left wing jumped into action and advanced. The light horse (see photo above) swept around the back of the Roman line making for the Scorpion ballista. In the centre the skirmishers returned to hassle the advancing Romans. On the right Magicstix was jumping in the air and waving his staff but nobody was listening, or could make out what he was getting excited about. The exposed unit of Romans that had chased off the light horse was left completely unmolested and the opportunity slipped by…(another failed command roll).

BritonsVsRomans (11)cBritonsVsRomans (13)cBritonsVsRomans (14)c

Fourth Turn

Roman auxiliary archers moved into the wood on the Roman right flank and crossed to the right hand edge to threaten the advancing Briton left wing cavalry (just out of shot on the photo).  The exposed unit on the Roman left retired back into the battle line. At the back of the Roman line a unit of legionnaires tried to charge the light horse to their rear. They needed two moves to be successful (one to turn around and the next to charge), as we were beginning to expect, the command roll was failed and they only turned around on the spot because of the ‘drilled’ special rule.

BritonsVsRomans (16)c

The Briton light horse then charged the Roman Scorpion Ballistae… lost the combat, and ran for the hills in their shame (break result in the morale test)! The medium horse charged the auxiliary archers that were in the wood. We (I) made another mistake here…The horsemen needed to get a three move command to make the charge, they needed to turn to face the archers (which were on their flank), then adopt open order. And finally with the third move they could charge. To be on the safe side the Archers (in open order) elected to evade. The medium horse made the roll and got the required three moves…the archers then rolled for their evade and only got one move! Now the mistake happened, instead of the horsemen moving as infantry (6″) in the wood, they moved as cavalry (9″) and caught the evading archers who were then destroyed. If we had done it correctly they would have evaded the charge…

In the centre the skirmishers continued to pelt the Romans, and on the right Magicstix was still jumping up and down over the legionnaires that had managed to escape. Nobody was listening to him…

BritonsVsRomans (17)c

Fifth Turn

During the Briton fourth turn the light chariots had advanced around the edge of the wood to threaten the Roman flank but…one of the Roman units was facing to their rear (having failed to charge the light horse). Being rather rash, they decided to charge the chariots and did…the chariots counter charged, immediately disorganising the advancing infantry and then proceeded to batter them in the melee. After the melee the Romans retreated, but the chariots declined to follow up. Elsewhere the Roman line stood splendidly still and attempted to throw javelins and send out small groups to chase off the skirmishers which had been pelting them continuously. They (the Romans) were not very successful in their endeavours…

BritonsVsRomans (18)c

On the Briton right flank Magicstix had finally calmed down enough to be shouting actual words, and his light horse swept forwards to re-engage the Romans.

BritonsVsRomans (23)c

On the Briton left the time was now! The Roman right flank was in disarray! The warband on the left flank raced to get around the wood and the cavalry prepared to charge the disorganised legionnaires. They needed a three move command to get out of the wood, form back into close order and then charge…! They actually only got one move. Disaster! they were now out of the wood right in front of formed heavy infantry, and in open order! To protect them the Briton chief ordered his skirmishers to close on the flank of the Romans to try and prevent the inevitable charge in the next turn that would be so costly to the medium cavalry. He then commanded his 2 warbands and light chariots to charge the Roman line! They were having none of it and decided a better coarse of action was to retreat (blunder – result two moves to the rear)! At this point they ‘should’ have been moved off the table but again we (I) made a mistake and just moved them to the base edge.

BritonsVsRomans (20)cBritonsVsRomans (19)c

And then the shooting began…The second unit on the Roman left flank (behind the ones that had retreated from the chariots) were Praetorians. In a desperate bid to try and save the cavalry the Britons threw everything at them. Their armour was decidedly lacking whilst the Briton cavalry javelins and slingers made their presence felt, almost every shot casued a reduction in unit stamina and then horror of horrors (if you were Roman)…a morale test was required…the dice rolled, they clacked together…they spun slowly…you know what is coming….”snake eyes”. Goodbye Praetorians, it was unpleasant knowing you.

BritonsVsRomans (21)c

Sixth Turn

The Romans were feeling a bit bleak…they needed something. So, the ballistae shot at the cavalry in desperation, and the Briton cavalry were unnerved and ran off in disorder to the other side of the wood. The legionnaires then threw javelins at the light chariots and chased them away in disorder too… Another unit of Legionnaires charged forward to chase off the bothersome skirmishers, who simply skipped away.

On the Roman right Magicstix had ‘played a blinder’. Whether by luck or judgement (lets go with judgement) the unit of light horse between the lines of Britons and Romans was perfectly placed so that if the Romans charged as a Division they would only get as far as the intervening, lets call them ‘speed bump’ and then have to stop to fight. They would then be too far away from the main Briton line that even a sweeping advance would not get them into combat. Feeling demoralised the Roman commander decided not to charge.

BritonsVsRomans (22)c

On the Briton left, the chariots and medium cavalry could do nothing. The warband was commanded to charge around the wood and engage the Romans. They sort of listened but did it their own way (blunder – uncontrolled advance for 1 move). In the centre, skirmishers closed in around the exposed legionnaires that were still in a sorry state after their chariot affair (since the warband had neglected to become involved).

On the right Magicstix persuaded his other unit of light horse to join the first and between them both they managed to cause the Praetorians to their front to retire in disorder.

BritonsVsRomans (24)cBritonsVsRomans (25)c

Perhaps you are wondering where the Briton chief is with his warbands and light chariots in the centre of the Briton line? Well, he was still issuing commands…they just weren’t listening.

BritonsVsRomans (26)c

Seventh Turn

On the Roman right the legionnaires at the back tried to escape the skirmishers by charging at the warband that had began to come around the edge of the wood. They fluffed the command roll and only advanced one move forwards because of the ‘drilled’ special rule. As a consolatory prize the ensuing volley of javelins they launched disordered the warband.

The other roman units on the right flank tried to chase off the skirmishers but either didn’t get enough of a move to make contact, or where they did the skirmishers managed to successfully evade them.

On the Roman left. The Praetorians failed to recover from disorder (they are elite 4+…) and the other legionnaires attempted to charge the Briton warbands to their front. This time it was inevitable…if they got the charge distance then they would either chase off the skirmishers and then contact the warbands behind. Or fight the skirmishers and be able to charge the warbands in a sweeping advance afterwards. All they needed was to get a two move charge…all they needed was to roll two under the command requirement…and…they rolled…and they got…one move! So ground to a halt in front of the skirmishers!

BritonsVsRomans (27)cBritonsVsRomans (28)c

On the Briton left. The skirmishers continued to pelt the hapless legionnaires in the rearmost unit. The Briton cavalry managed to form into close order at last, in position behind the disorganised warband. In the following shooting the Romans were at last reduced to ‘shaken’.

BritonsVsRomans (29)c

This is the view from the Briton’s chief…

BritonsVsRomans (30)c

A lovely exposed Roman flank, just ripe for a unit of Light Chariots to go and cause some mischief. And did they? No they did not, another failed command roll!

Meanwhile on the Briton right flank Magicstix had order his whole command of Warbands to charge, after moving his skirmishers out of the way (with an initiative move). It was perfect! A warband on its first charge, supported to right, left and behind against a Roman unit which only had rear support!

The melee was impressive! Even with their pilum the Romans managed only 3 successful points of stamina off the Britons. In return they suffered 8! (We give the warbands the’ wild fighters 3′ special rule as per the scenario in the Hail Caesar rule book). The Romans needed a break test. They needed to roll well… And they did! Retreat one move in disorder but then when we came to move them, because of the angle of their initial charge the Briton light cavalry was now behind them…preventing their retreat. Awesome planning from the Druid, he must have foreseen it!

Result = two Roman units destroyed!

BritonsVsRomans (31)cBritonsVsRomans (32)c

Eighth Turn

The Romans were in trouble now. One Division (on their left) was broken, another (on their right) had all commands shaken. It was down to a roll of the dice, could they rally the shaken legionnaires on their right flank to prevent the army being broken…No.

And that was that.

BritonsVsRomans (33)c

An excellent game of Hail Caesar and the first time in about five years, in fact the first time ever that the Britons have won against the Romans. All those years of playing Warhammer Ancients and being unceremoniously destroyed can now be forgotten. And the less said about Chris and Dean’s appalling luck with the dice the better.

Thanks to Chris and Dean the hapless Roman commanders, Michael (Briton left flank) and Nigel (Magicstix the Druid). For my part I’ll take all the glory thank you very much as the victorious Briton Chieftan even though the centre Warbands and Light Chariots refused to listen to me all battle…

Alternative Bolt Action Rules

Here are my thoughts on some alternative rules for use in Bolt Action.

This isn’t me saying that Bolt Action is anything other than great fun, I just feel like it could have been something else. Maybe you’ll find something you agree with, maybe you won’t.

Alternative Bolt Action

Albuera – A scenario for Black Powder

This is the scenario that was used for a re-fight of Albuera at Albancih 2015 on the terrain boards described in a separate post:

Albuera – Making the terrain board.

Introduction

On 4th May the British under General Beresford besieged Badajoz with a small army of around 20,000 British and Portuguese. Marshal Soult had just finished putting down a rising in Andalusia and had gathered together a French army of ~25,000 with which to raise the siege. Having tricked the British into thinking he was preparing defensive positions he marched as quickly as possible towards Badajoz with the intention of defeating the Spanish army under Blake and Beresford’s British/Portuguese in detail.

Beresford learned that Marshal Soult had set out  to relieve the fortress. He therefore decided that it would be better to meet this threat in the field, raised the siege and arranged to join with a Spanish army under General Jochim Blake at the semi-deserted village of La Albuera.

The scene was set for a pivotal battle in which Soult’s magnificent flank attack and sweeping cavalry charges by the Vistula Lancers were defeated by stubborn, brave British and Spanish soldiers standing their ground despite the odds.

The Scenario

This is a fairly large battle and the scenario as written/used was based on representing 800 men as a Battalion /400 cavalry as a regiment /8 guns as a battery, but you could alter this as needed to suit what you have available. The strength of each Battalion / Regiment / battery is given in the attached files to help you do this. Note that we made some adjustments to suit the scenario for example the two Battalions of Kings German Legion are represented by one large Battalion but we could have equally decided to represent them as two small Battalions. Also, arguably French light infantry should be treated exactly the same as line infantry, however, we like the difference…When you play it you can do it your way :).

The scenario starts before Soult’s flank attack and gives the French player the option of entering from directly in front of Albuera and attacking as Beresford expected.

Deployment maps and OOB are given in the attached files, play sheets are included to make life easier…

Albuera Allied Deployment v1

Albuera French Deployment v1

There are some ‘special rules’ to cover interpretations of the terrain. Note that these are partly based on the terrain boards we used depending on how you choose to represent the battlefield you might want to changes/ignore some of these. In particular it would probably be better to extend the battlefield beyond what we represented to show the start of the wooded area North of Albuera and the rickety bridge thus avoiding the entry requirements for Hamilton. An additional scenario rule that potentially allows the bridge to be used might add a bit of flavour and may mean the Allied player deploys Collins to watch this flank as he did historically.

Albuera Special Rules

The Battle As We Played It At Albanich 2015

Some things in the photos that might need a little explanation…we use four 30mm x 30mm stands of 6 figs to represent an Infantry Battalion. Skirmishers (when deployed) are represented by an additional ‘skirmisher base’ that has a frontage of 60mm and 3 figs occasionally we will leave the skirmisher base on the table but move it to the rear of the battalion if they are not deployed, it depends on how much confusion there is at the time and what we think looks better at that point in time.

For light infantry we have an additional two skirmisher bases, sometimes modelled with 4 figs, when the entire Battalion adopts open order we deploy both of the skirmisher bases and remove two of the close order bases. To help us keep track of what is where…we tend to keep the four bases in base to base contact.

Cavalry Regiments are depicted using six 30mm x 30mm bases of 2 figs, that we like to field in two ranks to represent a Regiment in successive lines.

Initial Allied deployment:

Spanish on the left…

Albanich2015 (3)c

British in the centre and Hamilton’s Portuguese on the right.

Albanich2015 (4)c

Portuguese cavalry watching the river crossing.

Albanich2015 (1)c

Godinot’s division enters and begins to cross the bridge over the River Albuera. The 27th Chasseurs a Cheval and 4th Spanish Chasseurs à Cheval lead the way and guard the open ground to allow artillery to deploy in a forward position but receive the unwelcome attention of the KGL firing from the buildings of La Albuera . The long snake of infantry trudge along behind…

Albanich2015 (5)c

Meanwhile, to the South Latour-Maubourg’s cavalry division moves to seize the high ground on the open plain.

Albanich2015 (8)c

Godinot deploys light infantry to support his artillery but a surprise attack from the rash British cavalry sweep them from the field. The cavalry are then badly mauled and retreat back to the British camp where they spend the rest of the battle tending their blown mounts and injured troopers (missing photos due to the high level of excitement…). A gaping hole opens in the French front as their infantry desperately try to get over the bridge (repeated failed command rolls/blunders). British light troops (rifles) come forward to harass the deployed French artillery while the line infantry behind them struggles to get organised. (many failed command rolls…). A few Battalions (Werle) have made it to the high ground to the left of the artillery but the collapse of Godinot on their right and the long delay of Gazan to come into the action has made it impossible for them to attack.

Albanich2015 (10)cAlbanich2015 (9)c

On the French left flank… The cavalry division has entered and deployed in an orderly fashion in preparation to launch a sweeping attack on the weak Spanish flank of the Allied army. Another (Girard?) infantry division enters and moves to occupy the high ground  to support the attack. It is looking like an unstoppable force is about to be unleashed and the Spanish commander is feeling decidedly nervous. His infantry even more so as they refuse to obey commands.

Albanich2015 (11)c

The French cavalry division sweeps down on the Spanish army… charging ahead of their supporting infantry that are still in March column

Albanich2015 (12)c

But the Spanish cavalry puts up a bravely counter charges (!) and despite heavy Spanish losses and the French successfully taking the high ground they have suffered greatly and the attack grinds to a halt (as the French desperately try to overcome disorder and rally key regiments to stop the division becoming broken…).

Albanich2015 (13)c

But the French cavalry attack opened the way for Werle to attack in the centre! The Spanish are teetering on the very brink of collapse but refuse to run and against the odds they hold back the surging French infantry inflicting casualties and sowing disorder in the French line.

Albanich2015 (14)c

Girard’s French infantry  are struggling to keep pace with the ferocious cavalry attack and can’t deploy quickly enough to press home the fleeting advantage…(more failed command rolls, only getting the single free move for being in column of march).

Albanich2015 (15)c

Finally the British and Portuguese get into order and begin to advance on the French column that is struggling to get across the bridge and ford. Godinot’s division is on the brink of being broken as a Portuguese hammer approaches…

Albanich2015 (16)c


And that was as far as we got…always the way when trying to have a game at a show with so many shiny items on stands to browse rather than playing the game. It was fun though, even though I was umpiring rather than playing.

Dean and Bob were the French commanders of the day and they had a spectacular run of bad command rolls with entire divisions sitting stationary for turn after turn, except the French cavalry attack which surged forward at break-neck speed. The luck was not much better for Nigel, Brian (Spanish + British) and Chris (British + Portuguese) but at least it actually meant we had a game of it rather than them surging forward and crushing Godinot/Werle at the ford.

As usual Black Powder provides a nail biting game even if we didn’t get to a conclusion. It was looking very bad for the left flank of each army!


Albuera – Making the terrain board.

For the Albanich 2016 show (Dumfries) we, and by ‘we’ I mean Nigel…decided that doing a re-fight of the battle of Albuera from the Peninsular War would be a good idea. The theme at Albanich was horse and musket to celebrate the 200yr anniversary of Waterloo. The scenario details and OOB will be in another post.

I am writing this about a year after the event. At the time I did a lot of research into the battle and the layout of the key features on the battlefield. It was my original intention to write a detailed account of what I concluded and include links to where I got the information from and arguments as to why I concluded certain things. However, I have left it too long and now I can’t remember, and I have put my notes in a safe place that I now can’t find :(. So apologies to all those excellent web resources I found and also if you have stumbled upon this looking for more, all I can do is tell you that Google is your friend and there is a wealth of material that is easily found on this battle. Nevertheless I hope this will be of some use regardless.

Our initial thoughts were to use a published scenario from Fields of Glory scenario book for Shako rules, and for me to build a suitable terrain board. We already had a good amount of 15mm Napoleonic miniatures between us and to keep the cost down we would use that (even if the uniforms were not quite accurate). The rule system of choice for us is Black Powder so we would need to adjust the scenario to fit but it had a modest number of battalions in the scenario so all seemed very doable, with little headache / expense. At least that was the plan…but then I got a bit carried away.

The initial scenario required modelling both sides of the valley and began at the opening of Soult’s feint towards Albuera and after Blake’s Spanish have moved into position to oppose them. This sets the scene for Soult’s impressive flanking attack.

Here is my first sketch of how the terrain board was going to be laid out. It’s a bit hard to make out because the text has not scanned too well (and I have compressed the image), but the general gist is that it will require a 9ft x 5ft table. The terrain around Albuera is gentle rolling hills so contours were to be ~10mm in height

Albuera sceanrio for Dumfries

It was all looking very straightforward and then this happened… http://www.peninsularwar.org/albuera.htm

I discovered a very detailed map and as a result of doing more research I also learned a lot more about the battle, the initial movements of the various armies beforehand, and the soldiers involved.

So…I started again. This time using the more detailed map from the web page above, the one that shows the initial starting dispositions I changed the area of the battlefield that we would fight over.

For Black Powder we use four bases of 30mm x 30mm to represent a Battalion. This gives a frontage of 120mm on the table-top, which is roughly equivalent to 150yds. Now, I can’t find any of my previous notes or the sketches of the terrain board I made before making it, but I used this as a basis to determine how much of the battlefield to model and what ground scale to use. It won’t have been precise though as there needed to be some compromise to make the game/scenario playable. Also it was fixed to be no more than 9ft x 6ft as we had a 10ft x 6ft table at the show, and you need a little bit of space each side for keeping rubbish (and drinks) off the battlefield.

I also changed the scenario…more on this later.

The table was to be made up of 3ftx2ft boards for ease of carrying and fitting in my van. Previously (River Bug game) I had made 5ft x 2ft sections but this then needed me to make a frame for transport which was something I was keen to avoid this time. The boards were made from 6mm ply wood using 2″x 1″ planed wood, frame and strengthened with a central batten. Raw materials awaiting attention.

Albuera(1)c

This is where I made my first mistake…I measured to the wrong side of the circular saw blade and made all the boards 2mm shorter than intended!

I then arranged all the boards and drew out the terrain in pencil. I coloured the features so that I could make sense of it but really there was little point in doing this as it was all going to be covered. It felt good to stand back and look at it though :). I couldn’t resist putting a few minis on the board and some 6mm scale buildings just because they were all I had. This is actually Godinot’s Division in its starting position, for a sense of scale.

Albuera(5)cAlbuera(2)cAlbuera(4)cAlbuera(3)c

Although I have not been able to share my planning stages, you can hopefully now see that the battlefield is quite different to that in the original scenario. It is a bit easier to see later on when the boards are built but just in case you are wondering, the battlefield has moved significantly West to cover the shallow valley behind Albuera where the Allied armies initially deployed. This was at the expense of covering all of the valley to the East of Albuera, but it was a wooded area that concealed Soult’s movements anyway so I considered making this bit ‘off table’ would have little impact on the scenario.

My second mistake though…If I had extended just 6″ further North (so that Albuera moved 6″ towards the centre of the board) it would have taken the battlefield to the natural edge formed by the woods to the North, giving enough ground for Hamilton’s Portuguese to deploy on table :(.

The next stage was to glue blue foam onto each board and shape the contours. Unfortunately you have to buy the blue craft foam by the box. So to save money I bought a box of 5mm thick foam in 600mm x 600mm sheets. This gave me a 5mm base layer all of the boards so that I could cut out the river with shallow banks but meant I would have to laminate the sheets for all the other contours. It is a bit of a pain doing this as when sticking the sheets together with PVA glue it doesn’t set very well in the centre of the sheets and you end up faffing on with pulling them apart in some areas, or cutting out the middle that has not set and then re-gluing them. Using 10mm thickness sheets would have saved a lot of heartache but also doubled the cost for the craft foam.

Albuera2(1)cAlbuera2(2)cAlbuera3 (1)c

There was a decision to be made of which of Nigel’s bridges to use for the main bridge. After positioning them each on the developing terrain it was decided that the bigger bridge would be better, even if it was a little out of the ground scale.

Albuera3 (3)cAlbuera3 (2)c

Next stage was to draw out all the roads and other features.

Third mistake… I thought I was using a permanent marker. It turned out to be a water based marker that then bled through when I got to the painting stage :(. Should have just used pencil.

The next stage was to put some texture on the boards.

I used polyfiller for the roads, this was painted on with a 1″ brush in the direction of the road to give an impression of cart wheel ruts.

The rest of the board was coated with PVA and then sprinkled with dried sieved sand. I also mixed up a paste of sand/PVA and this was then pushed into the gaps between the craft foam sheets to hide the joins between contours. Second photo shows the boards at the back being weighted down while the glue dries (after afore mentioned patching of un-set areas). Incidentally – the bottle of beer is mine, the crap larger was left at our house following a party by somebody to embarrassed to come back and collect it afterwards…

Albuere4 (2)cAlbuere4 (1)c

Once dry, the boards were all painted with emulsion paint. I used ‘Dancing Bear’ from the B&Q range, followed by a dry-brush with ‘Lions Slumber’. Everything was painted the same, then the river was painted with several coats of a very dark green called ‘evergreen’ (rivers are either brown or green in my experience…even though it looks a bit blue in the photos). The white roads are where I have gone over them again with the polyfiller. I was relying on the change in texture between the sand and polyfiller to provide a good differentiation between the road and other ground so that I would not have to ‘sink’ them into the terrain.

Albuera5 (1)cAlbuera5 (2)cAlbuera5 (3)c

Although these boards were being made for a specific event IP wanted them to have a bit of longevity and flexibility for use in other games. Therefore the terrain elements other than the main contours were all modelled separately. To the East of Albuera there were olive groves. These were made in the same way as the boards using 3mm ply cut and shaped as required. I chamfered the edges and added some stone walls made from strips of cork wall tiles. These were a pale brown colour so I didn’t even need to paint them, I was not very careful about painting the ground around the walls as this helped tie them into the ground.

Albuera6 (1)cAlbuera6 (2)cAlbuera6c

For olive trees I picked up some cheap trees from e-bay and mounted them on washers using hot glue. They were also based using the sand/PVA paste that was used to hide gaps between the craft foam sheets. A tip here is to mix a bit of paint in with the sand/PVA it makes painting the bases a lot easier.

Albuera8 (1)c

Next, the entire board was given a dry brush with ‘Moroccan Sand’ emulsion from B&Q.  This was applied heavily on the roads and other contour areas where I wanted the contour to stand out, for example the river cliffs below Albuera. The walls of the olive groves were also picked out with this.

Albuera7 (1)cAlbuera7 (2)cAlbuera8 (2)c

The River was given several good coats of the ‘evergreen’ paint. When dry brushing the roads I allowed the brush to lightly go over the river to give an impression that the water was shallow at the fords. The river was then coated several times with clear nail polish that I ‘borrowed’ from my eldest daughter – thanks Bridget…to give the water a shine and a transparent film to give the impression that the colour came from depth.

Stone chippings were glued along the banks of the river, these were also dry brushed with ‘Moroccan Sand’. Finally, some foam flock was glued along the banks to represent increased vegetation. I was considering using lichen to show small trees/unruly bushes but I decided this would be better as scatter rather than a fixed part of the boards.

Albuera9 (2)cAlbuera9 (1)c

Albuera was not intended to be a representation of the town itself and was based on buildings that Grahkam already had in his collection. The base was made in exactly the same way as the olive groves. It did initially start off as very regular looking but ended up a bit more interesting.

Albuera7 (3)cAlbuera7 (4)cAlbuera10 (4)c

Albuera10 (3)cAlbuera10 (2)cAlbuera10 (1)c

Albuera10 (6)cAlbuera10 (5)c

The main elements of the boards were now completed and all that was left to do was the addition of flock. Now was the time to make sure that I had made something that would fulfil its purpose and accommodate the necessary battalions included in the revised scenario. So I made cardboard counters for each unit of the Allied armies and positioned them on the developing board in their starting positions, luckily everything fitted. Or at least it did more or less, this was when I realised my mistake with not allowing enough space for Hamilton to deploy. I did consider making an additional board, but in the end decided to just go with what we had. Hamilton would just have to ‘enter’ the battlefield…(You can see Hamilton as the column of bases on the right of the photo…it should be a line extending to the edge of the wood 6″ off the board edge).

Albuera11 (1)cAlbuera11 (2)cAlbuera11 (3)c

The big flock was next… I used a mix of all kinds to give greener more fertile looking valleys and parched looking hills. Especially the area to the top left of the photo. I added some flock around the base of the walls in the olive groves and also some to the walled areas in the town to give an impression of gardens.

Albuera13c

The area around the town of Albuera has fields but these do not have hedges/fences around their borders. The borders would be made up of the stones that have been removed from the ground during ploughing. So I made up some fields using the same principals as used for the olive groves but using the PVA/sand paste to build up the edges.

Albuera14 (2)cAlbuera14 (3)cAlbuera14 (1)c

I also made up a separate piece of terrapin to show a marshy/boggy area that was shown on some of the maps I had seen.

And here are the completed boards:

Albuera19 (2)c

EDIT: The white dots beside the road (upper right) are tents of the British encampment. They were made using folded paper…very simple.

This was the last photo before they were packed for transport to the show. On the day we added scattered lichen to show scrubland, but you can see that in a separate post that will include details of the scenario/OOB and some photos taken on the day.

Thanks to Nigel for the enthusiasm that sparked mine, the bridge and to Graham for the buildings.

Also thanks to Chris for the moral support and air-brushing the trees to make them look a bit more like olive trees.

25/28mm American Civil War

Nigel put on a game of good old ‘Fire and Fury’. It had been years since the last time I had a game of ACW using those rules but as expected I fell right into his trap.

The scenario he put on was a quite simple attack defence affair with a couple of Confederate brigades of foot with a few cannon supporting them trying to oust a fairly similar number of union regiments from a defensive position at a river crossing. It was a great game though. The Union dismounted cavalry took an amazing amount of shifting and the lines of infantry surged and recoiled across the battlefield in that manner which is peculiar to F&F and both exciting and excruciating as a player.

If you have never played F&F I urge you to do so, it is always an exciting game and predictably the outcome was that feeling that begins in the pit of your stomach and you know is going to cost you ££’s especially as Nigel had put the game on using 25/28mm figures! It was also a bit of a perfect storm as only matter of a couple of weeks away was the Gateshead wargames show. After a quick chat with Nigel it was decided that what he really needed was a few more Union infantry…

At the show…I picked up a couple of boxes of Perry plastics – Union Infantry and Cannons with limbers. Also Old Glory UK had a stand and it has to be said that I really like their miniatures, so I picked up a Union regiment pack from their 25mm range too. I also had a bit of luck that one of the traders had a single ACW mounted commander for sale at a discounted price!

Here are the plastics, painted and in the process of being based…and then with the bases partly done.

ACW (7)ACW (5)

ACW (4)

The Perry plastics are really good, the miniatures went together well and they have a decent amount of detail. The artillery pack is fantastic since it provides a good amount of options but most importantly (to me) the three cannon it contains all come with a limber! Of course it would be even better if they had horses but its not a great chore to get horses especially when you can swap one of the cannons + limber with a mate for them (thanks Nigel!).

As I have already said, I do really like Old Glory miniatures and these ACW were a joy. There was a large variety of poses in the regiment pack – in fact I don’t think any two miniatures were actually identical! Here is a photo of them undercoated and dry brushed with white prior to painting:

ACW (6)

And then a photo of the completed Division awaiting the bases to be completed:

ACW (3)

For painting these I used Vallejo ‘Oxford Blue’ for the main dark blue of the Union coats and I mixed up a light blue just using what I had to hand for their trousers. I was not too fussed about the actual shade of the blue for either since there was not such good colour control during manufacturing back then anyway.

For the bases I use a slightly different method these days since reading Henry Hydes ‘Wargaming Emporium’ ( a very fine book). In there he talks about his method of mixing sand with PVA glue and then using a cocktail stick to spread it around the base. This is the method I use now, but I also mix some of the paint in with the sand so that it makes painting it afterwards easier. I have found that using this method is much easier than painting a base with PVA and then sprinkling sand on it because it is less messy and also gives a bit more depth to the look of the base.

The paint I use is ‘Dancing Bear’ emulsion from B&Q, its only a few £’s for a tester pot and goes a very long way.

When this is dry I dry brush the base coat with ‘Lions Slumber’ from the same B&Q range, this gives (I think) a very natural earth look to the bases and they are then ready for flocking. For these I used some static grass and a some fine whitish gravel (ballast from N-gauge railway I think).

Photos of the completed division all ready to go! Note the missing horses on one of the limbers – this has since been rectified.

ACW (2) ACW (1)

Flags are currently simple colour printouts so will be replaced with something of higher quality at some time in the future…

Bolt Action – House Rules

When we play Bolt Action at our club we use a selection of house rules that we find add to the game. In case anyone else wants to see what we do and so that I can record them somewhere we can all view them easily I have decided to post them on here.

Note that this is in no-way a criticism of Bolt Action as it is played if you follow the rules to the letter, its just how we like to play it. We are not ‘competition’ gamers and we seldom if ever use the points values as a way of deriving the forces for our games. We also like to alter rules to fit how we like to play. Games with more uncertainty appeal to us more than those without and generally provide more opportunity to laugh at each others misfortune, which is how we like it. Read on at your peril 😛

Rough ground

We use a random modifier of -D6″ to any movement over rough ground/obstacles.

Orders Dice

We tend to use more orders dice then there are units as a means of giving one side an advantage in command control i.e. Germans versus early war Soviet. Also we use a ‘dice of doom’ (more later…), so we don’t actually remove dice from the bag when a unit is eliminated. Instead when a player has moved/activated/attempted to activate, all his units then any extra orders dice pulled from the bag are set to one side. Every dice extra to the first spare that is pulled from the bag is then discarded.

Dice of Doom

We place one (or two) orders dice of a unique colour in the orders bag. When these have both been drawn the turn ends. Units that have not activated do not get to activate…we find this makes gaming the orders sequence a risky business. We did originally just use a single dice for the end of the turn but after trying with two we have found the added tension of knowing one of them has been drawn adds to the game.

Single figure units

When a unit is reduced to a single figure it is removed, this only applies to squads. For support weapons etc. we allow the single figure to remain and operate the weapon.

Unoccupied transports

Unoccupied transports can move freely once per turn without the need of an orders dice, providing they do so before the ‘end of turn’ dice is revealed. This is because we don’t consider unoccupied transports to be a unit (unlike the rulebook).

Dug-in in prepared positions

Troops dug-in in prepared positions count as in hard cover and as if ‘down’ for the purposes of taking casualties from indirect fire (i.e. half the number of hits), going ‘down’ does not give any extra benefits.

Barbed wire

Impassable to wheeled vehicles.

Tracked vehicles cross at advance rate -D6″ and destroy a section of barbed wire on passing.

Infantry must take an orders check to cross and treat as rough ground.

Engineers cross as rough ground without the need to take an orders test and remove a section of barbed wire.

No assaults can be made over barbed wire (that was its actual purpose).

Mine fields

Exposed when troops come into contact. Roll 1D6 (as per preparatory bombardment pg118 of the rule book).

Strikes the bottom armour of armoured vehicles (+1 penetration). Engineers roll at -1 modifier. If the unit has RUN orders apply +1 modifier to the roll.

Fully armoured vehicles count any penetrating hit as light damage only.

All movement stops at the edge of the minefield. Minefield is impassable to all except engineers which clear the minefield on passing an orders test, they cannot fire while clearing mines.

Close combat results

Instead of the looser being eliminated: The looser retreats one full RUN move and takes a pin marker for every casualty suffered in the close combat.

Indirect artillery/mortar fire

Roll a scatter dice ( 4 arrows, 2 hits) + a dice marked 2,4,6,8,10. misfire.

The result Is either a hit, a direction and a distance deviated, or a misfire.

If the shot deviates use a 2″ radius circle to determine if it still hits any viable targets. If it does continue as normal as if it were a ‘hit’ on that unit.

If the misfire is rolled then either the shot deviates widely, or is a dud or something else happens that means it has no effect.

Other notes and ideas we are playing with:

The ranges for the weapons in BA are a bit strange to us. For example: Medium mortars have a longer range than 75mm field guns when historically it was substantially the other way around. One of the ideas we are considering at the moment is making all indirect fire from artillery have an unlimited range. We would still keep the range limitations as they are for direct fire. The argument being that the actual battlefield is somewhat more difficult to see over than our table top. Mortars would be unaffected by this so the light, medium and heavy mortar would still retain their normal range limitations.

Battle Fleet Gothic Chaos Fleet

Typically we go and get into a game a mere few weeks before the manufacturer decides they are going to stop supporting it and stop casting anymore miniatures…

For anyone that hasn’t come across this game yet, it is a sci-fi space fleet combat game at the level of squadrons of escorts and capital ships. It is a GW game but…its from back when they actually designed decent games and it wasn’t all about ‘pay to win’. A typical fleet might be a few squadrons of frigates/destroyers supporting maybe half a dozen cruisers and a battleship. The rules are pretty good and there is plenty of really nice aspects such as launching ordinance in the forms of torpedoes or fighters/bombers and the minimum distance ships have to move before they can turn.

Clearly you have to have a ship so equipped before you can launch fighters/bombers but the idea of having a carrier in the fleet appealed to me even before we played our first game. It was even better when I realised the whole game is full of choices, there is nothing you can do that isn’t a matter of summing up the array of options before you. Sometimes it comes down to the least worst option, which is an aspect I particularly like in a game. Anyway, you can read loads of reviews of this game elsewhere.

When Rick showed us all this game for the first time it was an Imperial versus Chaos fleet skirmish, Nigel and me were the Imperials. Although this ended in an imperial victory it was the Chaos ships that appealed to me, especially since Rick had painted them a deep red colour reminiscent of the Cygnus from the ‘The Black Hole’ movie. If you don’t know what this was or have never seen it, check out this link http://www.imdb.com/title/tt0078869/, the guy in the review that talks about Maximillian the robot has got it dead right!

Anyway, from that game onwards I had to get me a Chaos fleet. This is despite my usual aversion to anything with the word Chaos in the title and also my aversion to anything from GW…In my mind they are just cool ships from a different fleet.

Since GW were good enough to stop making the models I have had to source the fleet from e-bay but luckily I have managed to get them all in an unpainted state so far, the cruisers were unmade plastics still on the sprue. So here is the current fleet:

BFG Chaos (3)BFG Chaos (2)BFG Chaos (1)

(3 photos because I am struggling with my new camera…)

The fleet is made up of:

An Acheron class heavy cruiser. The main armament of this ship being long range lances.

In BFG a lance is a generic term for a hard hitting weapon, think of them as powerful lasers or such like. They ignore the armour value of the target ship and always hit on a 4+. 

BFG Chaos (8)

A Devestation class cruiser. This is a carrier and enables the fleet to launch either fighters for defence from torpedoes or enemy bombers, or to launch offensive waves of bombers or assault ships.

Currently I have eight stands of fighters but there are more on the way. The fighters are from Brigade Games and mounted on 20mm square bases. The number of fighter models on the base makes no difference at all so 3 is a nice number as they are suitably spread out so that the base doesn’t look to overcrowded. Also the Brigade Games fighters are about the same size as the GW ones but are much more reasonably priced. I really don’t understand why anyone would pay for the GW or Forgeworld ones.

BFG Chaos (9)BFG Chaos (10)

Two Murder class cruisers. These are damn fine cruisers and I have high hopes for them in coming games. The Murder class cruiser has very strong weapon batteries to each side and a lance that can fire forwards.

BFG Chaos (5)BFG Chaos (6)

Three Idolator class raiders. Fast and manoeuvrable escort ships that carry a lance and small weapons battery. Expecting these to be quite good at being a real pain in the rear for whoever they are fielded against.

BFG Chaos (12)

Four Iconoclast class destroyers. Small and weakly armoured but fast and manoeuvrable with a small weapons battery.

BFG Chaos (11)

Painting these ships was a doddle but that said, I have never been so uninspired by models that I like so much…must be because I have a psychological block against anything with the word ‘Chaos’ in the title.  All were glued to the stands and then undercoated with a matt black spray. This had the added benefit of giving a smooth even coating on the stands that was devoid of brush strokes.

After that, a heavy fairly wet ‘dry brush’ of scab read from the GW range. This was to give a good base covering but to allow the black to show through in the recesses. I then blended some ‘bright red’ into the scab red and dry brushed to pick out the details. The amount of bright red was increased depending on how it felt at the time, most ended up with a final brush of just the bright red.

Details picked out in a dull metallic silver and bright green or yellow as you can see on the photos.

The varnish I have used has gone a bit ‘gloss’ it is supposed to be matt…not that I mind much, but they did look better when matt before they were varnished. At some point I might get some of the Army Painter matt spray and give them a quick going over to dull them down.

Currently waiting for a Battleship to arrive (another e-bay impulse buy) and that will be about it for this fleet. I don’t intend on purchasing anything else although I’ll probably keep an eye on e-bay in case any bargains come up. The fleet needs a better carrier I think…so possibly another Devastation or a Styx heavy cruiser (bigger carrier), but this is currently 975pts worth so doesn’t really need anything else for the games we play.


Bolt Action Scenario AAR

Finally…some months after we played this game I have got the time to update this post.

The basic scenario was a couple of inexperienced Soviet platoons racing to cut off the retreat of the remnants from a failed German attack that were trying to get back to their own lines. The terrain was an unfordable river with a single bridge that the Germans had to get over in order to return to the safety of their own lines. The remaining table was made up of forest. The forest was made up of impassable areas that blocked line of sight (thick clumps of trees, rocky outcrops, dense marsh….use your imagination!) and more open areas that did not hinder line of sight but provided concealing cover. We allowed infantry to move as normal but vehicles suffered a -D6″ on every move.

The Soviet forces:

SOVIET platoon 1 comprising of 5 units and given 7 red dice in the dice bag.

PHQ 1 x Second Lt (+1 to orders), 1 x anti-tank rifle OR 1 x light   mortar. REGULAR
Infantry Section 1 7 x Rifle + LMG (8 figures in total). INEXPERIENCED
Infantry Section 2 7 x Rifle + LMG (8 figures in total). INEXPERIENCED
Infantry Section 3 8 x Rifle (8 figures in total). INEXPERIENCED
Support 1   x Truck1   x Light Howitzer, 4 Crew INEXPERIENCED

SOVIET platoon 1 comprising of 5 units and given 7 dark brown dice in the dice bag.

PHQ 1 x Second Lt (+1 to orders), 1 x anti-tank rifle OR 1 x light   mortar. REGULAR
Infantry Section 1 7 x Rifle + LMG (8 figures in total). INEXPERIENCED
Infantry Section 2 7 x Rifle + LMG (8 figures in total). INEXPERIENCED
Infantry Section 3 8 x Rifle (8 figures in total). INEXPERIENCED
Support 1   x T-26 INEXPERIENCED

Note: We gave the soviet player(s) a choice of either a light mortar or an anti-tank rifle as part of the PHQ. In this game these support weapons were an integral part of the PHQ, its not quite how they are used/chosen in the BA rule book, but that’s how we roll!

Also, notice that the two Soviet platoons have dedicated orders dice of a different colour. When I thought up this scenario it was designed as a three player with two Soviet players (any extra players above three would be German…).

The German Forces: 9 units, 15 dice in the bag (all the same colour).

PHQ 1   x Major  (+3 to orders)1   x anti-tank rifle

1   x light mortar.

REGULAR
Infantry Section 1 1   x SMG, 5 x Rifle + LMG (7 figures in total). REGULAR
Infantry Section 2 1   x SMG, 5 x Rifle + LMG (7 figures in total). REGULAR
Infantry Section 3 1   x SMG, 5 x Rifle + LMG (7 figures in total). REGULAR
Infantry Section 4 1   x SMG, 5 x Rifle + LMG (7 figures in total). REGULAR
Support 1   x 80mm (Medium) Mortar REGULAR
Support 1   x MG34 Team (MMG) REGULAR
Support 1   x Panzer III (37mm) REGULAR

Special Rules:

German – 1) The units of the PHQ cannot be assigned to other units, you are too busy retreating… 2) No mortar spotter, open sights from the mortar team only.

Soviet – 1) Place one black dice in the orders bag. This represents a spotter from the pursuing Soviet force getting sight of one of the German units. A shot can be taken from any point on the Eastern table edge (the German starting edge). It counts as a light Howitzer, with range measured along the line of sight from the table edge. 2) Units from the PHQ can not be split from the PHQ. 3) Soviet platoons use different coloured orders dice to represent the lack of shared command control / radio.

Victory Conditions:

No German units exit from the Western table edge and Soviets control the bridge at the end of the game = MAJOR SOVIET VICTORY

Destroy all German ‘support units’ = MINOR SOVIET VICTORY

Germans control bridge at the end of the game, less than four units exited = DRAW

Any 4 units exit the Western table edge = MINOR GERMAN VICTORY

MMG, Mortar and 2 x Panzer III exit the Western table edge = MAJOR GERMAN VICTORY

Setting-up:

German units move on during their first activation from the centre of the Eastern table edge.

Soviet units move on from the North or South road ends in their first activation. Each platoon must enter entirely from one road end and they can not both enter from the same one.

If the first turn ends without all units entering, subsequent units enter as reserves (i.e. orders test at -1 to enter).

How it Played:

We have played this scenario twice now, these photos are from the first game but it has been too long and I can’t remember all the details of exactly what happened on each turn. You can get a basic gist of it from the photos though.

It was a Soviet white-wash. From what I remember Chris (Germans) brought his usual good fortune and Nigel’s (South edge Soviet with the Howitzer) inexperienced Soviets managed to decimate the Germans in fire fights. We named one of the Soviet units ‘the squirrel shooters’ as they were clearly all marksmen! The Soviet T-26 lumbered onto the table and spent a number of moves not quite sure where it could add any value. Eventually it rounded a clump of dense foliage to take a shot at a Panzer III and was promptly blown to pieces by the return shot.  Meanwhile at the Southern end the other Panzer III was being repeatedly hit by the Soviet artillery, but being of WW1 vintage it could not penetrate the thick (relatively!) armour, the crew were getting mightily shaken-up though.

At the end of the game the Germans had been all but annihilated in the dense forest. Both tanks were still operational but the one in the South was badly shot-up…(pinned beyond being useful!). A resounding Soviet victory.

The second game we played was identical in every way except for the result. This time the Germans went all out for the bridge and (from what I remember) took control of it. The Soviets were then eliminated in detail. Notably the Soviet artillery was overrun in fairly short order!

If you have a go at this scenario let me know how you find it.

BA AAR 23-04-13BA AAR 23-04-13 (1)BA AAR 23-04-13 (2)

BA AAR 23-04-13 (3)BA AAR 23-04-13 (5)BA AAR 23-04-13 (4)BA AAR 23-04-13 (12)

BA AAR 23-04-13 (7)BA AAR 23-04-13 (14)

BA AAR 23-04-13 (18)  BA AAR 23-04-13 (16) BA AAR 23-04-13 (15)  BA AAR 23-04-13 (13)  BA AAR 23-04-13 (11) BA AAR 23-04-13 (10) BA AAR 23-04-13 (9) BA AAR 23-04-13 (8)  BA AAR 23-04-13 (6)   BA AAR 23-04-13 (17)   BA AAR 23-04-13 (20)BA AAR 23-04-13 (19)

KR Multi-Case for BA

Normally I like to make scratch built cardboard boxes out of thick card (2mm thick…) to store miniatures. When I make thes boxes I include specifically sized compartments to match the specific miniatures/basing. However, the other guys all have these fantastic foam filled cases that are a lot less effort to make and dont need to be carefully carried or stacked. So, at long last I sucumbed and ordered a case from KR Multicase.

Wow…thats it really! I dont think I will make another cardboard box, even though I actually enjoy making them.

The first set of miniatures to get the special comfortable box were my 28mm WW2 Russians and Germans. I spent a bit of time on the KR website oooing and arring and gernerally procrastinating over making a purchase but eventually went for one of the half depth pick-and pluck trays and two 1/4 depth trays with enough compartments in to fit 50 figures.

My WW2 is based to include two-man teams on 50mm diameter bases, which all conveniently fit into the pick and pluck tray. Including the prone miniatures which could be slid in on their ends. The tray comes with all the slots filled with foam that is fairly easily cut out.

WW2BA (30)

The next tray is mostly plastic Russians:

WW2BA (31)

And the final tray is all the Germans and some extra russians that didnt fit in the one tray.

 WW2BA (32)

I did slightly modify the trays so that I could put the kneeling miniatures in the right way up. This meant I could cut out the dividing foam between two sections and fit 3 miniatures in the space for 2.

My verdict though…these cases are fantastic. I have finally seen the light. Thank you KR…

28mm WW2 Soviets

Well what would you know…completed another project! This time my WW2 Soviets which are aimed at the period from the German invasion to Kursk, but mostly the earlier period.

All the miniatures are from the Plastic Soldier 28mm Russian Infantry pack, as discussed in my previous post about them. There are a couple of odd metal minatures from Crusader among them but they are very hard to spot until you pick them up (metal vs plastic)…look for rifles with bayonets.

Firstly the overview of everything. On the left are the early war armour of two T-28 and three T-26, on the right is the mid/late war armour of an Su-76. Of course these armoured vehicles should never really be fielded toghether as all the T-26 and T-28 were destroyed before the Su-76 made its appearance.

WW2BA (17)

The infantry, five sections each made up of 2 x SMG, 5 x rifle and a DPMG team (or record players as a certain person at our club calls them…)

WW2BA (22)

Mortar supports. two 80mm Mortar (medium mortar) and two 50mm Mortar (light mortar).

WW2BA (23)

MMG’s…two of, deployed and moving.

WW2BA (24)WW2BA (29)

A Flame thrower team. Including a single miniature for casualty removal purposes, or until I get another command type miniature to put with him on a base.

WW2BA (27)

Anti-tank rifle teams. Better photos in the other post about these miniatures.

WW2BA (25)

45mm Anti-tank guns

WW2BA (20)

76mm Putilov artillery. It is a current bugbear of mine that these 7km range guns are classed as ‘light howitzer’ in Bolt Action which gives them an on table maximum range of 48″ which is somewhat less than the range of a medium mortar (60″). Anyway, grumping aside, here they are with trucks for pulling them around. These guns are from the Battle Honnors WW1 range but they are (or seem to be) the 1930’s version with an elongated barrel so actually fit WW2 rather than WW1.

WW2BA (19)WW2BA (18)

Armour support, two lumbering but deadly to infantry T-28 and three utterly hopelessly armoured T-26 death traps, good gun on them though…

WW2BA (21)

Not pictured sperately (look back at the overview shot) are two command groups each of three figures and three female figures that could be used to represent a medical team. And…I have three spare prone LMG teams that I don’t quite know what to do with… 

 WW2BA (28)        

 As usual, I am telling myself that this lot is now complete but…I know that should I come accross one I will probably get either a KV-1 or a KV-2 for that extra Russian sense of presence.